
March 11, 2015
Handy and Helpful Brewing Tools
We all know that you don’t need fancy equipment or gadgets to make good beer but if you want to step up your brewing hobby, make the day go a bit faster and even make your beer better, there are a number of items you can add to your brewing inventory. If there’s no budget for new equipment now, make a list of what you want, then, when it’s birthday time, Christmas or Father’s Day, (ok Mother’s Day too!) or even “I won the lottery” day, you’ll be ready to grab one or more of these items.
Some items are best used by the more experienced brewer but these items can be helpful to all experience levels. I’ll just mention a few items that I feel have helped me become a better brewer and also to learn something new about brewing along the way.
Refractometers-one of the things that has helped me be more consistent in my brewing is the use of this neat little device. There are a number of styles but most cost about $50 and if you buy one, look for one that shows both Brix and gravity readings, often listed as ‘dual scale’. The great thing about this device vs. a hydrometer is that you can use it at any temperature and get an accurate reading.
Mostly used by all grain brewers to check the mash to follow the conversion, it’s helpful when using along with recipe software to see if pre-boil gravity is reached. I follow the boil with a few measurements to see if I’m on course to meet my final gravity.
It should be said that while it can be used after fermentation has begun, you need to do a bit of math to make adjustments to be accurate but I simply use my hydrometer once fermentation has started.
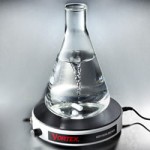
Stir Plate and liquid yeast– If you’ve decided to try liquid yeasts, which will allow more control over your beer due to the greater variety of yeasts, you’ll likely want to make a yeast starter. While you don’t need a stir plate to do this, it does make the process easier and it’s great, geek fun!
Stir Plates are available in many sizes and prices are all over the place. The newer versions have variable speeds and some are digital and even have timers to make their use even geekier. Using an Erlenmeyer flask is preferred but you can use almost any container that is clean, sanitized and has enough head space for krausen. Plan in advance for the size flask you want as they come in sizes from 1 liter to 5 liter with 2 being the most popular. I’ve found that using a 3 liter flask allows me to make enough starter for a big beer (ale) and still have some left over to store in the fridge for future use. This saves me enough money over the course of the year to pay for 2-3 six gallon beers!
The down side, besides the fact that liquid yeast costs more than dry, is you need to plan ahead. I start about 4-5 days in advance if I plan on cold crashing the starter or 2 -3 days in advance if I plan on pitching without decanting. It’s easy to make a starter and I won’t go into the details here but all you need is the yeast, some DME and water. A little yeast nutrient is a good idea as well. There’s even free calculators online that can help you prepare how much you need to make for your size beer in order to kick-start your beer fast.
Then there’s the liquid yeast—-while many new brewers are fearful of using liquid yeast and it is more expensive than dry yeast, there are many, many more strains of liquid yeast so that you can imitate your favorite craft beer or just bring out certain flavors. Getting into liquid yeast can be daunting to some but it’s not only fun to try something different, it can change the way your beer turns out. There are varying opinions on how much difference, if any, using liquid yeast make and it’s hard to tell in many beers which yeast is even used. Of course, just like using dry yeast, using the correct amount for your beer as well as keeping the proper temperature during fermentation, can make all the difference. Ideally, you should pick the best yeast to enhance your beer and one made to fit the style and the great thing about it all is that once again, we have lots of options.
Wort Chillers-While not necessarily advanced equipment, wort chillers can be used for any size beer you’re brewing to help make your brew day faster. Putting your brew pot in a sink or tub with ice is a hassle and can take hours depending on how much beer you’ve made. The big advantage of a wort chiller is that you can get your beer to yeast pitching temperature so that fermentation can begin sooner and that can help your beer finish faster and also minimize infections. There’s other reasons as well such as causing solids (cold break) to fall out and help produce clearer beer. It’s also said it can help stop DMS from producing.
There are a number of chillers on the market but the most popular is the Immersion chiller. Most that you will see will be made of copper but stainless steel is another popular option. The purpose of this article is not to explain how these work so I won’t go into it but your ground water temperature does make a difference and the time it takes to bring your wort to pitching temperature depends on the temperature of the ground water as well as the size of your wort you want to chill. Immersion chillers come in varying lengths and diameters and the wider and longer they are, the faster they should chill.

Other chiller options are the Counterflow and Plate Chiller. Usually more expensive, they offer options for bigger batches and will work better with pumps.
Of course, you can always just brew smaller amounts and top off with cold water but I’ve learned that doing a full boil is best and definitely has made a big improvement in my beer.
Software-Brewing software is somewhat new to home brewers but, it can greatly help in just about every aspect of brewing from water volumes to mash temperatures, calculating IBU’s and even how much yeast you need. But, like most things computer related, garbage in=garbage out. Taking the time to input the proper ingredients and learning a bit about how each works can make your brewing day a breeze.
The options are changing every year for both free and pay for versions. Now there are a few that work in Android and iOS so no matter what you prefer, you can find something that works for you. I think the key to learning comes after you have a number of brews under your belt. Once you feel comfy with your brewing and get to know your equipment, learning the software will be easier.
Here are just a few of the more popular software options available for home brewers. A quick Google search and you can easily find out more about these and other very options that can help you create, save, share and learn how to make better beers.
These are just a few of the items that will help you not only become a better brewer but to enjoy brewing more. I now feel I can’t do without these items and there are many other things you can do to help improve your brewing as well. I’ve only quickly touched on these 4 items to keep things short and simple but as you move on with brewing, you’ll find that learning something new and using new or different equipment will not only make you a better brewer but save time, money and make brewing more enjoyable.